Sun Visor. First Attempt, Improvements to follow..

What sets your Spider apart from the rest?
Post Reply
wizard124
Posts: 748
Joined: Mon Oct 29, 2012 9:27 pm
Your car is a: 1980 124 spider FI
Location: Sheridan, WY exSan Rafael, CA

Sun Visor. First Attempt, Improvements to follow..

Post by wizard124 »

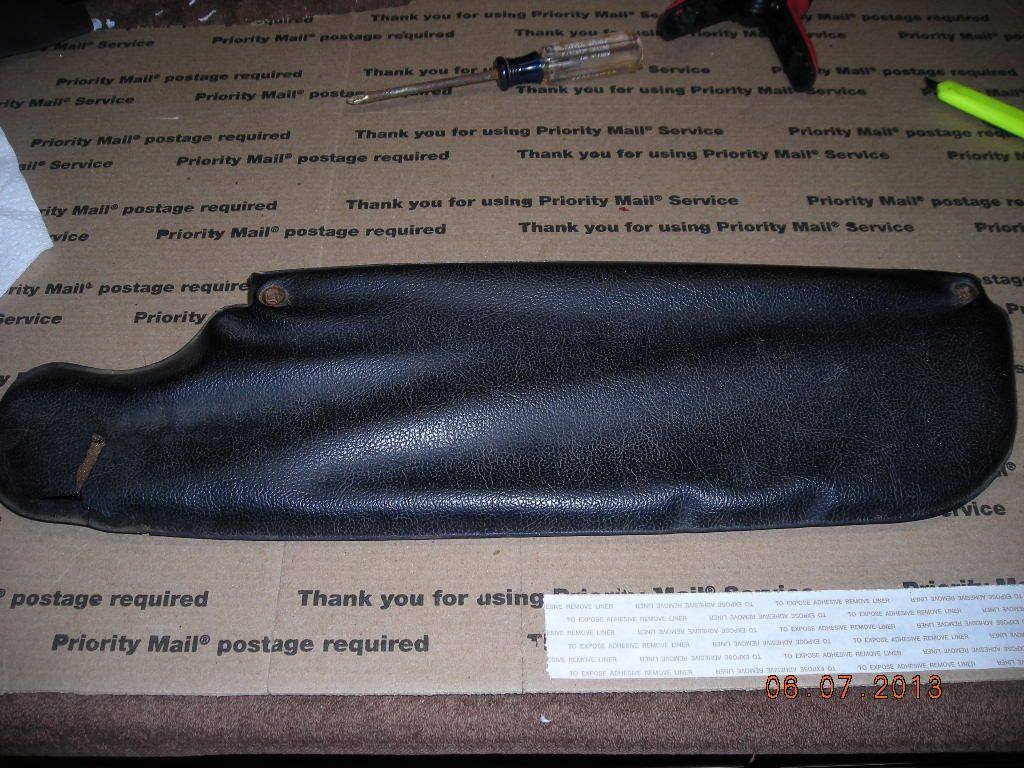
The original visors were aged and the interior foam deteriorated:
Image

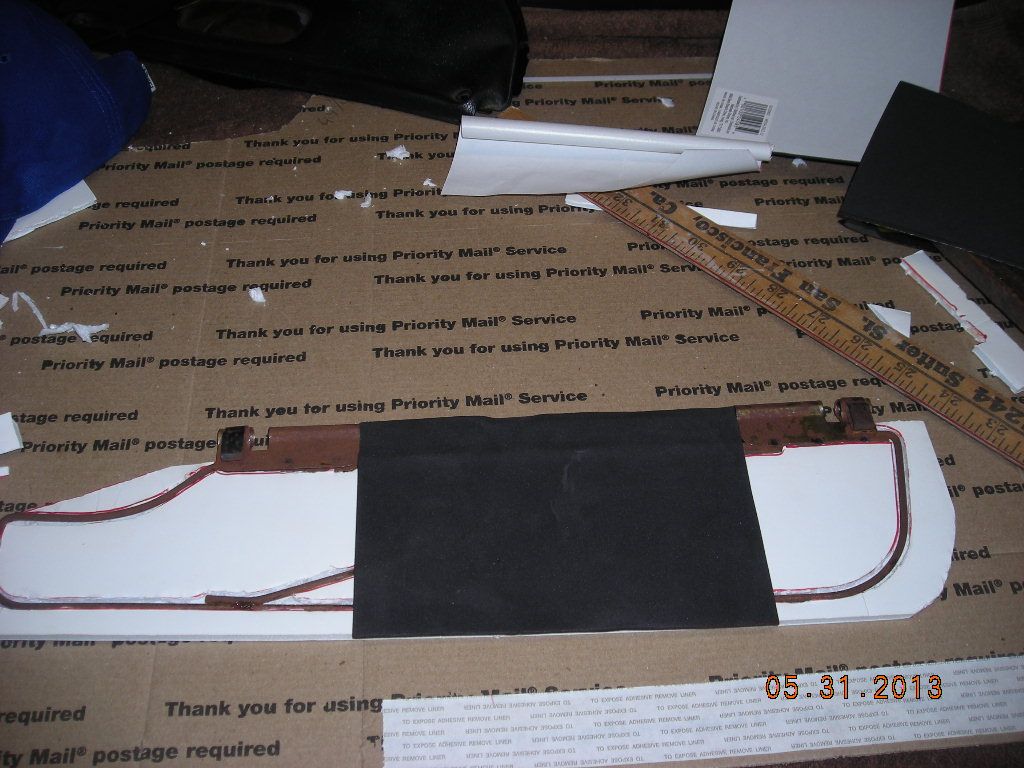
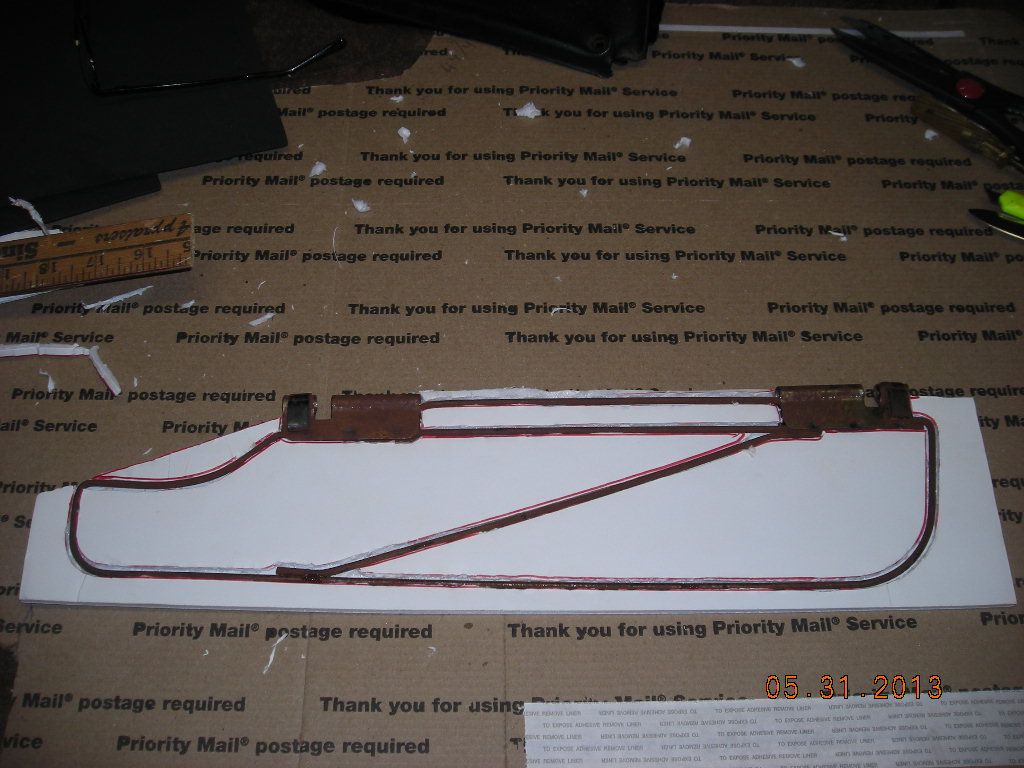
Using the original frame, I gouged out some foam board, inserted the frame, then covered with self stick foam. The foam board (3/16 inch thick) and foam sheet is available at crafts stores.
Image
Image

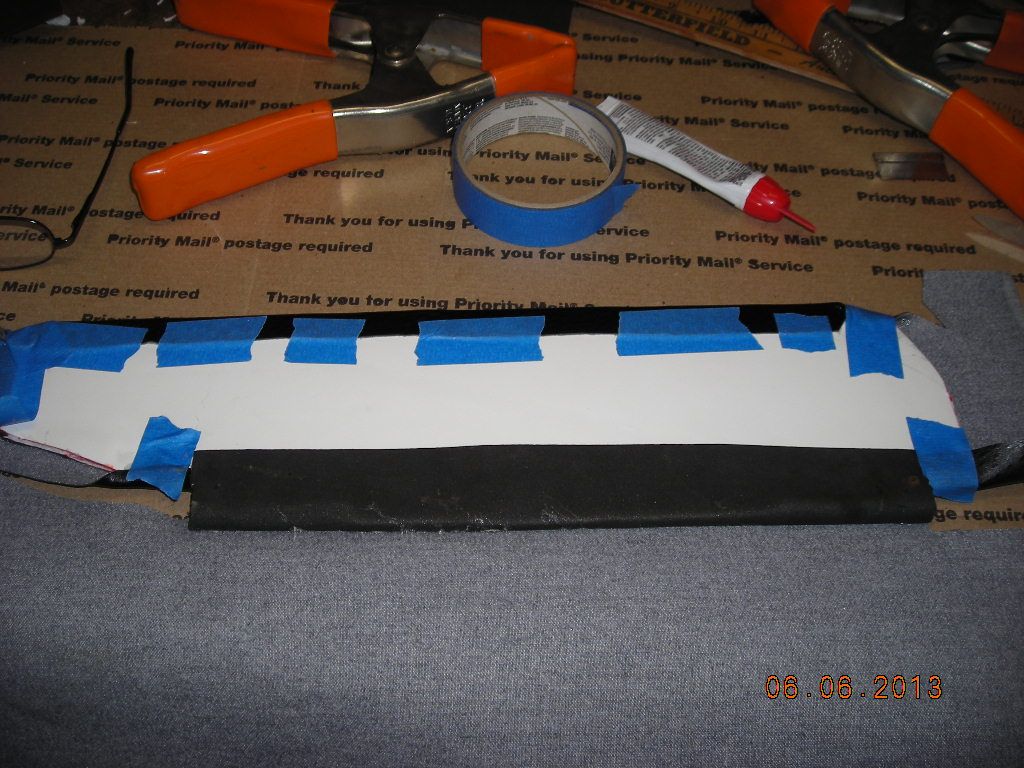
The vinyl, I purchased at a fabric store. My intent is to use this same pattern for the upper door panels for a coordinated look. Gluing, wrapping the hem, and clamping was a timely, multi-step process. I used a razor blade to trim the hem in the corners where it had bunched up.
Image

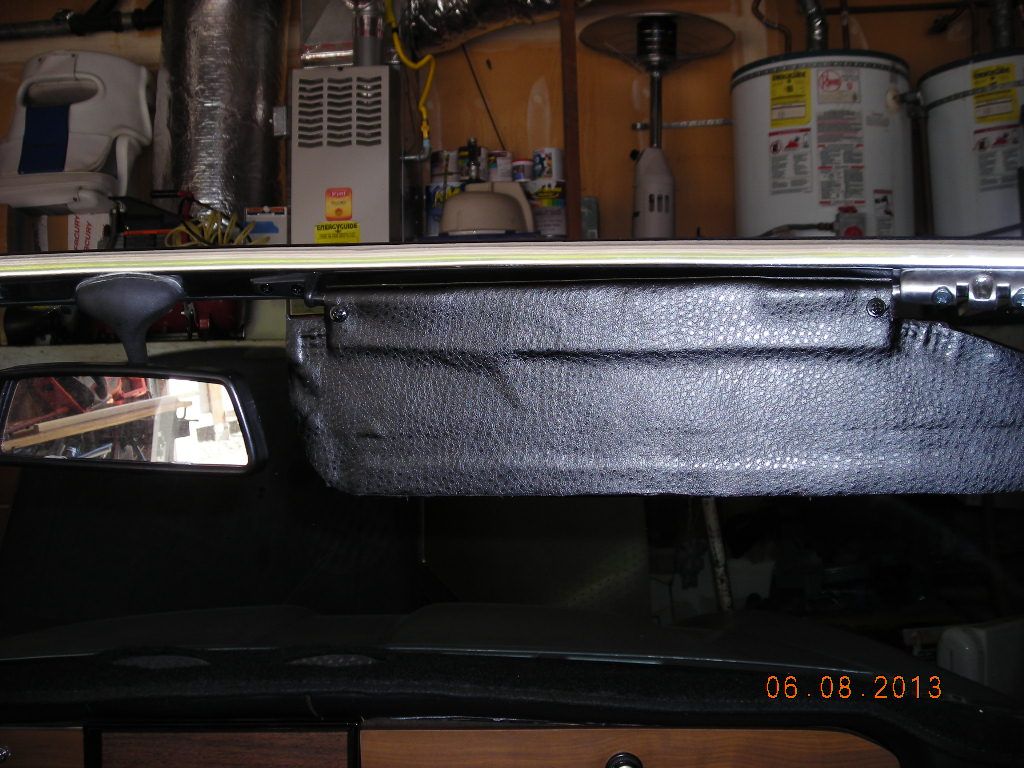
The finished product:
Image

OK, now for some self critique :oops: Not as nice a product as I had hoped. Better than before but room for improvement. I think the foam board and foam sheets offer a functional base (Does any one else have a better suggestion :?: ) The seams show through and are too distinct. The clamp marks haven't relaxed.
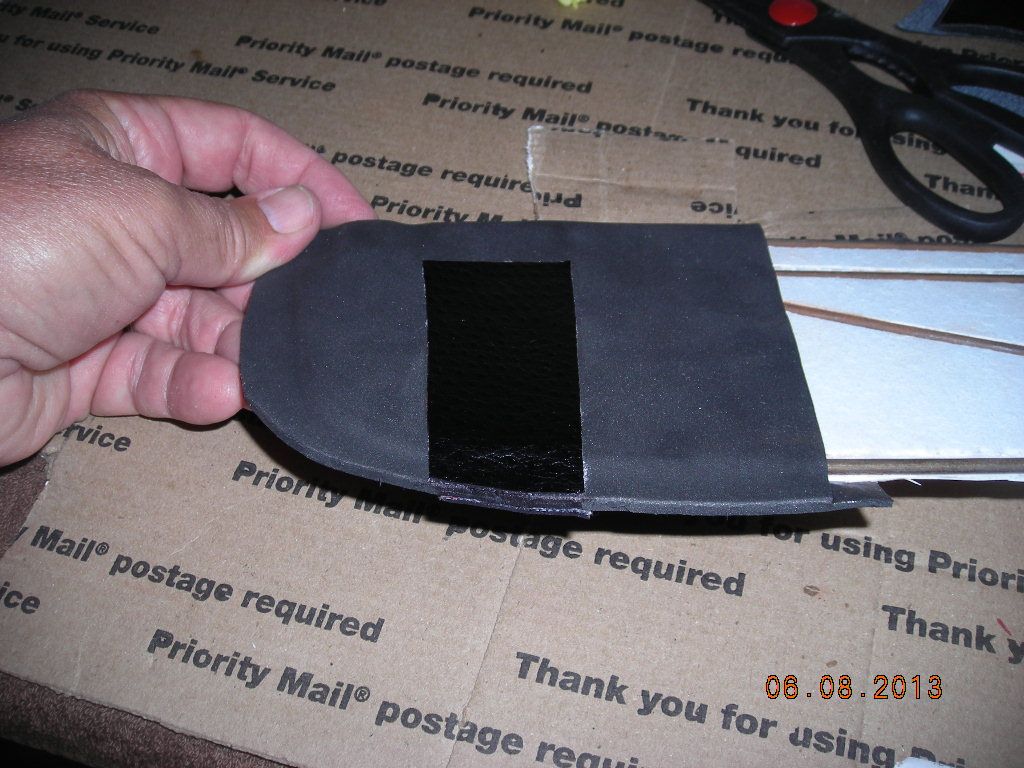
The driver's panel will be done a little differently. I will wrap the foam sheet around both sides of the board and extend the ends slightly longer so they stick together and taper off beyond the board edge. I'll glue the vinyl without the the wrapped hem. The foam sheets and vinyl will be trimmed together, leaving an edge about 1/4 inch thick.
User avatar
azruss
Posts: 3659
Joined: Sun May 30, 2010 12:24 pm
Your car is a: 80 Fiat 2000 FI

Re: Sun Visor. First Attempt, Improvements to follow..

Post by azruss »

I've done a bunch of upholstery work and what you are attempting is very very difficult to pull off. Anytime you overlap and glue a seam, it will show. I like your idea of extending the edge and gluing it. the secret here is to get a perfectly straight glue line. good luck on that. I had the idea of taking a small tube or windlace of some sort to put on the edge as a finisher. this will hide your glue seam. Good luck with the next one.
wizard124
Posts: 748
Joined: Mon Oct 29, 2012 9:27 pm
Your car is a: 1980 124 spider FI
Location: Sheridan, WY exSan Rafael, CA

Re: Sun Visor. First Attempt, Improvements to follow..

Post by wizard124 »

azruss wrote:I've done a bunch of upholstery work and what you are attempting is very very difficult to pull off. Anytime you overlap and glue a seam, it will show. I like your idea of extending the edge and gluing it. the secret here is to get a perfectly straight glue line. good luck on that. I had the idea of taking a small tube or windlace of some sort to put on the edge as a finisher. this will hide your glue seam. Good luck with the next one.
Yes, it is much more difficult than I expected it to be. Yes, some rookie mistakes.
The latest test: Trimming a single edge by cutting the foam and vinyl together. Better, without the visible seams. I think I'll try extending the vinyl beyond the foam for a double tapered finish.
Image
User avatar
joelittel
Patron 2018
Patron 2018
Posts: 1013
Joined: Tue Mar 08, 2011 6:53 pm
Your car is a: 1980 Spider 2000 FI
Location: Evanston, IL

Re: Sun Visor. First Attempt, Improvements to follow..

Post by joelittel »

What about using your foam core board/original frame to create the "base" and then spray mounting a thin sheet of additional foam (as thin as possible) to either side of that. Pay special attention to how you cut/shape the foam core board and the thin layers of additional foam around the edges of your "base" because this will play a big role in how your final product looks once covered with vinyl.

Cut the vinyl pattern, two pieces per visor - front and back, large enough to fold the entire edge over on itself and stitch down. Put a finished look on each side by using a sewing machine to stitch a relatively straight cuff along the entire edge. Meaning, you should have two halves, font and back, both with an edge folded over on itself creating a seam like at the cuff of your jeans (the fold goes to the inside and hides the cut).

This will be difficult, especially along the curves.

To make smooth clean stitch lines along the curves takes skill and creative use of small cuts on the inside of each curve. A hair dryer helps motivate the vinyl to bend or flex without buckling. Rubber cement (only along the edges, not in the center of your pieces) helps hold down the folds while positioning the vinyl. Once each side is stitched you can cut off any extra vinyl to make a clean surface for glueing the two sides together. Keep in mind that once you've glued the two sides together any extra material, foam or vinyl, will create bumps and contours along the seam of the finished product.

When putting it all together Shoe Goo works really well, it's flexible and long lasting. Plus, you do not need much. Run a bead of glue, the thickness of thick fishing line, as evenly as you can along the stitches on the inside of each of your vinyl pattern pieces. Sandwich your frame between the two pattern pieces and pinch the edges together with as many clamps as you can. Those black alligator clamps found in office supply stores work well, but use as many as possible leaving little or no space between clamps. This will help evenly distribute the glue along your seam and reduce noticeable blemishes.

I've been "improving" and "redoing" my visors over the last few winters, and getting better and better with each attempt. I have yet to make the foam core base described at the beginning of this topic, but the next time I "improve" my visors I will be doing just that and I'll take photos of each step along the way.
wikkid

Re: Sun Visor. First Attempt, Improvements to follow..

Post by wikkid »

Could you start from the foam core base idea on the frame, then form the visor you want in fiberglass? There is texture paint you can spray on that folks have used on dashboard restorations that would give you a black vinyl type interior look, but you would have a strong, rigid visor.
wizard124
Posts: 748
Joined: Mon Oct 29, 2012 9:27 pm
Your car is a: 1980 124 spider FI
Location: Sheridan, WY exSan Rafael, CA

Re: Sun Visor. First Attempt, Improvements to follow..

Post by wizard124 »

I really appreciate the inputs. Seemed like a simple job at the time :)

Joelittel: I think I follow you. I know your suggestion would lead to my disappointment. The cuff in the corners/curves with the vinyl bunching and trying to do 2 identical pieces and then glue them and have the edges match. Well beyond my skill set and patience. :cry:

wikkid: The textured paint is an interesting idea. I've done some fiberglass work. The resin runs and gets everywhere. I think it would be difficult to keep the resin from getting into the pivot areas of the metal frame. Additionally, the fiberglass mat shows through, so multiple coats would be needed to get a smooth surface. I am also thinking the fiberglass (if I could do a nice product) may be too heavy and the pivot points not be able to hold the visors tight.

BTW, I tried the double taper that I mentioned earlier. Difficult to glue and clamp and it didn't look very good.
fiat218
Posts: 5745
Joined: Fri May 16, 2008 5:06 pm
Your car is a: 1969 124 AS spider

Re: Sun Visor. First Attempt, Improvements to follow..

Post by fiat218 »

Buy new ones :D
Jim
East Grand Forks MN
1970 Fiat Spider BS1 ( FOR SALE
1969 124 AS Spider
2017 Abrath
2018 Alfa Romeo 4c Spider
wizard124
Posts: 748
Joined: Mon Oct 29, 2012 9:27 pm
Your car is a: 1980 124 spider FI
Location: Sheridan, WY exSan Rafael, CA

Re: Sun Visor. First Attempt, Improvements to follow..

Post by wizard124 »

fiat218 wrote:Buy new ones :D
It may come down to that :!: :roll: I'm not ready to give up just yet.....
User avatar
kbee00
Posts: 240
Joined: Tue Dec 21, 2010 6:23 pm
Your car is a: 1972 Spider
Location: Waukesha, WI

Re: Sun Visor. First Attempt, Improvements to follow..

Post by kbee00 »

don't buy new ones just yet- I am in the same position and would love to find out how to refurbish mine. sometimes you buy new, sometimes you find a way to keep what you have. and for some reason, I want to keep my originals too.

I split the passenger visor along the seam top and bottom -pulled out the old crap and the mirror. before I fiddled with the new stuffing I am trying to figure out how to reattach the two pieces back together again. I tested several glues - nothing held. I haven't progressed beyond that.

I would be glad to try another method - any thoughts?

kbee00
1980 Strada (crushed)
1982 Strada (parts for the 1980 then crushed)
1966 MGB (E-Prod race car - sold)
1968 MGB (Targa Newfoundland - totalled)
1979 Spider (current vintage restoration)
1972 Spider daily driver
Flyingthere

Re: Sun Visor. First Attempt, Improvements to follow..

Post by Flyingthere »

Another, unqualified thought, have you thought about making a front and back independently, wrap and glue then glew both sides together?
Just a thought.
fiat218
Posts: 5745
Joined: Fri May 16, 2008 5:06 pm
Your car is a: 1969 124 AS spider

Re: Sun Visor. First Attempt, Improvements to follow..

Post by fiat218 »

Buy new, move on to something worth while fixing
Jim
East Grand Forks MN
1970 Fiat Spider BS1 ( FOR SALE
1969 124 AS Spider
2017 Abrath
2018 Alfa Romeo 4c Spider
User avatar
kbee00
Posts: 240
Joined: Tue Dec 21, 2010 6:23 pm
Your car is a: 1972 Spider
Location: Waukesha, WI

Re: Sun Visor. First Attempt, Improvements to follow..

Post by kbee00 »

Flyingthere - not sure I follow the wrap and glue and then glue back together - could you explain that in a bit more detail?

I am attempting to re-use the original vinyl/plastic pieces. Mine is currently split into two pieces - split at the original factory seam.

Thanks for your input. If we figure out a way to refurbish old visors I think others will join the party. :)

kbee00
1980 Strada (crushed)
1982 Strada (parts for the 1980 then crushed)
1966 MGB (E-Prod race car - sold)
1968 MGB (Targa Newfoundland - totalled)
1979 Spider (current vintage restoration)
1972 Spider daily driver
Flyingthere

Re: Sun Visor. First Attempt, Improvements to follow..

Post by Flyingthere »

Sure make a front and a back. That way you can sandwich the frame and hide it but you can attach your material to each side independently. Wrap the material over the edges and glue in place on each piece then glue both pieces, front and back,together.
Hat way you would not have any visable glue points and the joints, potentially would be smooth.
User avatar
kbee00
Posts: 240
Joined: Tue Dec 21, 2010 6:23 pm
Your car is a: 1972 Spider
Location: Waukesha, WI

Re: Sun Visor. First Attempt, Improvements to follow..

Post by kbee00 »

Bob - I feel like an idiot - I can't quite follow what you mean.

I have split mine along the outer edge -all the way around. So now I have two separate pieces. I think they were heat joined at the factory and then trimmed to remove any flashing. Anyway, I haven't found a way to attach them back together again without the edge seam looking like it was cut apart.

Could you diagram what you mean? If it's easier to scan and email to me, I will post it on this site so everyone can see your idea.

Thanks for your patience!!

kbee00
1980 Strada (crushed)
1982 Strada (parts for the 1980 then crushed)
1966 MGB (E-Prod race car - sold)
1968 MGB (Targa Newfoundland - totalled)
1979 Spider (current vintage restoration)
1972 Spider daily driver
Flyingthere

Re: Sun Visor. First Attempt, Improvements to follow..

Post by Flyingthere »

No prob let me draw something up and share via email
Post Reply