
Here's what I started with. The center console I built 2 years ago. Vinyl covered plywood sides gave me a place to put speakers, and the design goal was to replace the backward slanting upper console (which I've never quite understood) with a more accessible surface. I put the radio and a couple additional small speakers there, along with the courtesy light and a couple switches.

Here's a better look at version 1.0 without the seats in the way. You can see what I was going for, but it just didn't turn out as tight/professional looking as I had hoped. You can see here that I used the wrong stain on the console and it always bothered me that the color didn't match the dash. For version 2.0, I decided to go minimalist to remove some of the bulk from the center of the interior.

With the console out, you can see where the carpet from each side of the tunnel leaves a big gap in the middle. The minimal console concept required me to replace the center section with new carpet that filled that gap.

Fortunately, I had done my own carpet using indoor/outdoor carpet from Lowes, so I was able to just go buy some more and cut a new piece to go over the center. The two black knobs on the drivers side of the tunnel are the heater controls. I ended up liking the location, but not the knobs (too big). You'll see farther down what I switched to.

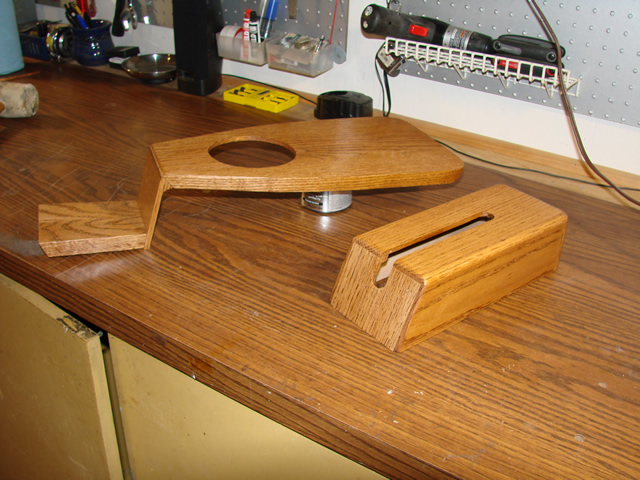
This is the handbrake cover. I made all the pieces of the new console from red oak.

Here you can see the handbrake cover and the shifter shelf in one of many dry-fittings. The dash is out for a little sprucing up, including a few fresh coats of polyurethane.

Another dry-fit with the seats in. You can see the smaller heater control handles on the side of the tunnel.

The final pieces getting stain and several (I think six) coats of poly.
Here's the final product. I am very happy with the way it came out - the pictures don't do it justice. From the driver's seat it is very unobtrusive. And the color finally matches the dash!


So there it is. No radio - I'm just using my phone with powered speakers, but still haven't found a great place to put said speakers. There are still some tweaks to come. I'll probably try to get a (smaller) cup holder down at the back-end of the handbrake cover. Today I put in the Ferraro steering wheel that I picked up last week. It looks good, but is significantly bigger around than my previous wheel, so there's no guarantee that it will stay.
I took pics from multiple angles at every step of the build - if you want to see all the rest of the photos, you can go here:
https://picasaweb.google.com/1028971919 ... directlink.
-- se


