Seat repair

Maintenance advice to keep your Spider in shape.
Post Reply
azygoustoyou

Seat repair

Post by azygoustoyou »

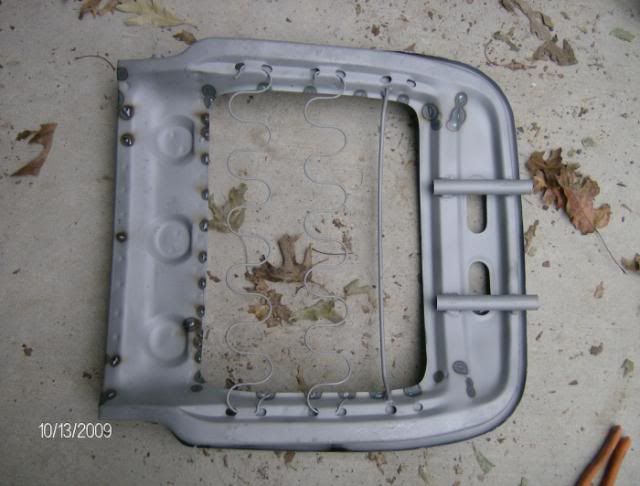
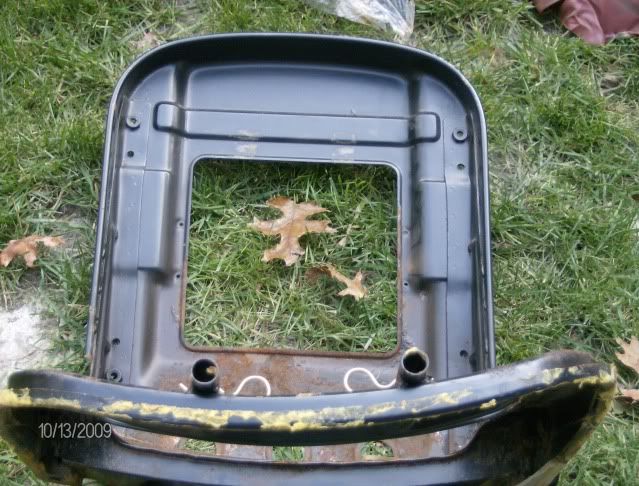
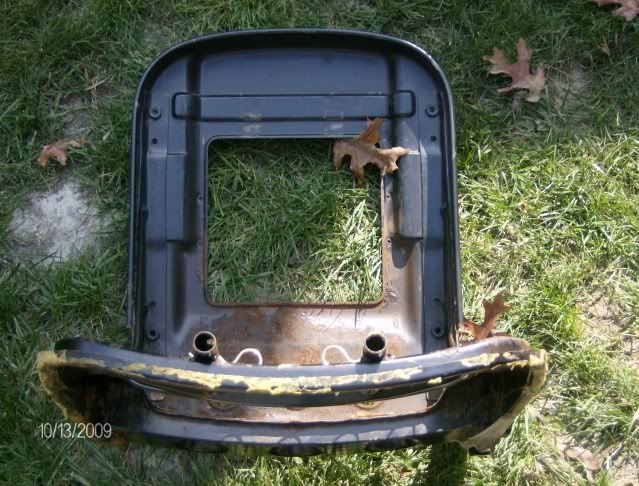
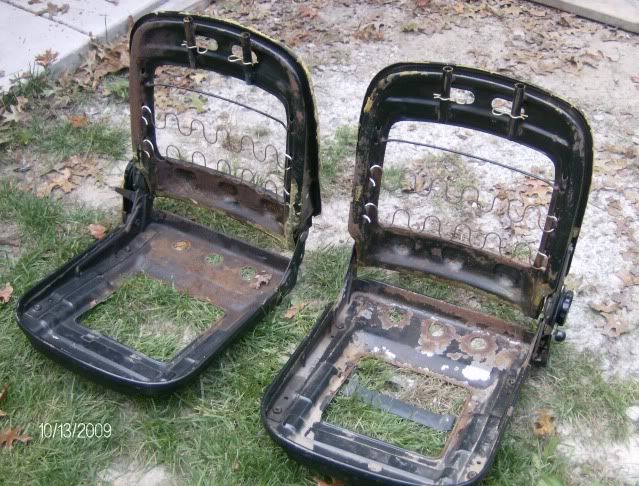
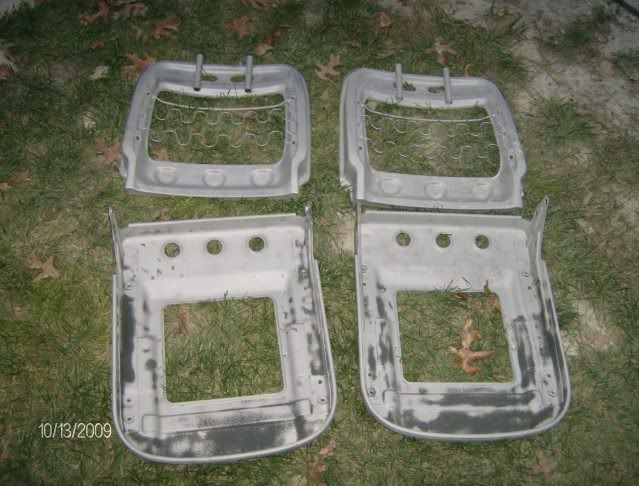
I got some 2000 seats for my 78. The frames were bent and I straightened them. They are blasted and ready for welding. Does anyone have any pic's of the proper way to add steel to strengthen the seat backs from warping? I only want to do this once. I will be welding the joints in the seats to strengthen them.
Image
Image
Image
Image
User avatar
manoa matt
Posts: 3442
Joined: Thu Oct 26, 2006 4:28 pm
Your car is a: 1978 Fiat 124 Spider 1800
Location: Honolulu, Hawaii

Re: Seat repair

Post by manoa matt »

Why didn't you use the seats from your 78? The later seats (79-85) are more prone to warp and crack when compared to the earlier (68-78) seats. The earlier seats are much easier to re-upholster too.

If you want to re-upholster those frames I hope you saved the seat cover material and more importantly the plastic strip that is sewn to the bottom seat cover.
lanciahf

Re: Seat repair

Post by lanciahf »

Brady,

As nice as those seats were they had that much rust? I would hate to think what my seats look like underneath the uphoulstry.
No wonder Fiat had/has a bad rap back in the day.

Regarding your question I think they break/twist on the lower seat back where the big open square is.

It would be really cool if you could add 6 inches of height to those seats backs,
azygoustoyou

Re: Seat repair

Post by azygoustoyou »

Well one of the seats did start to give and you can see a couple tares in the metal at the bottom corner. If you thought these were rusty. You should see my other ones. I don't see a problem adding height to the seat. I have to add foam to the seats anyways. One of them was almost torn in half. The support was pulled through the center. Would I have enough room to add 6-8" to the seat height with the roll bar? Adding the height, would the arch in he seat be completely wrong? I have to look at it. Let me know your thoughts. I did take pic's of each step if anyone wants me to post them to see what it take to redo your seats. :P
azygoustoyou

Post by azygoustoyou »

:roll:
lanciahf

Re: Seat repair

Post by lanciahf »

Yes please post pics. They are always helpful.
racydave

Re: Seat repair

Post by racydave »

Brady, I promise, I will never kid you again! Please post the pictures!!! :lol: My experience with the seats are ( lost pics due to computer change) Dont add any height. The seats will bend if you stay seated and turn around to raise your top. Welding is addictive, best toy I have is my MIG! 8)
pope

Re: Seat repair

Post by pope »

Agree totally Dave, my angle grinder is fun, but my Mig welder is very cool.
azygoustoyou

Re: Seat repair

Post by azygoustoyou »

Okay Guys,
I thought about raising the seat height and was going to attempt it. Then I thought- I just want to get the car done.
Here's what I have done to the seat and it is really strong. I tried to bend it and the only way it will bend is to break it.
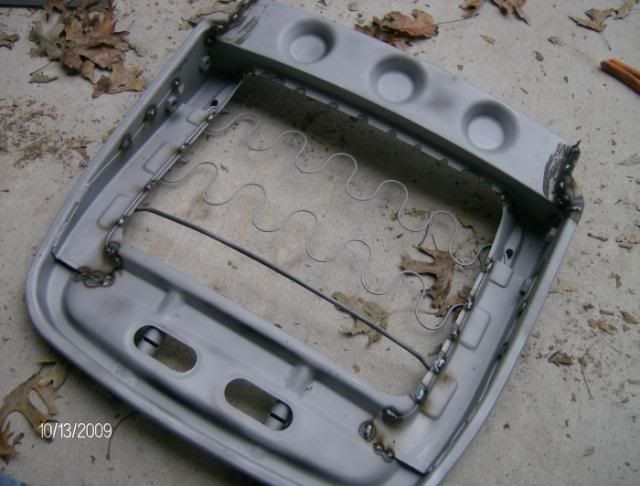
The first thing I did was to weld every seam.
Image
Image
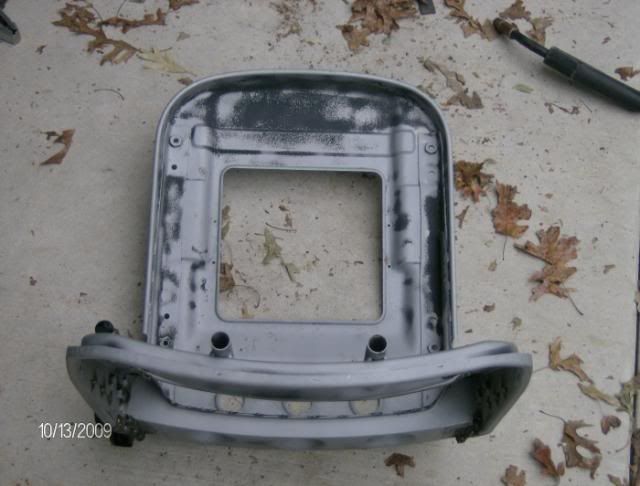
I then put the seat back together to make sure nothing warped.
Image
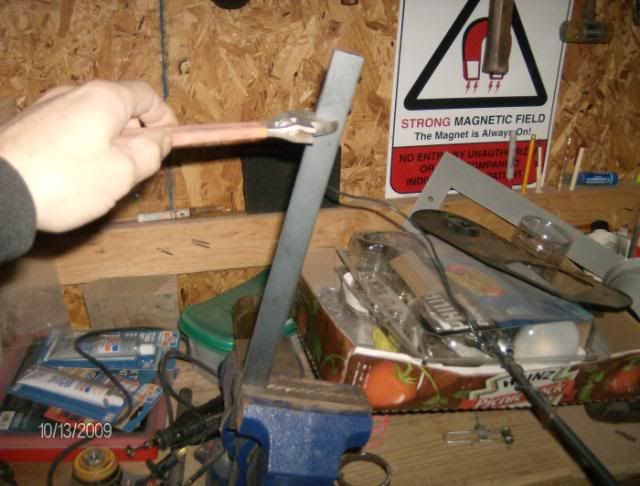
I bought some Hot rolled steel 1" wide, 3/16" thick. You will need two 14" long for each seat. Put the steel in the vice and bend it slightly so it will lay flat on each end of the seat.
Image
Position it so you can weld on both sides at the top but make sure the bottom sits next to the edge on the sides. Weld it doing spot welds. Make sure you don't hold the welder to long on the thin metal on the seat or you will melt through it. Weld longer on the steel to make sure you get a good weld.
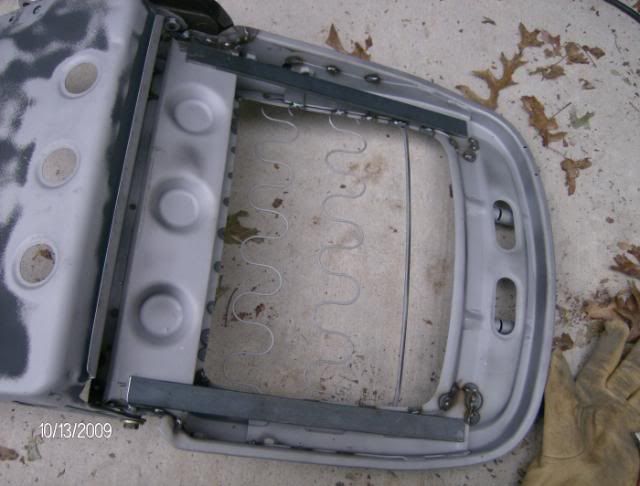
Image
A good idea is to paint under the steel and in the corners where the steel will cover.
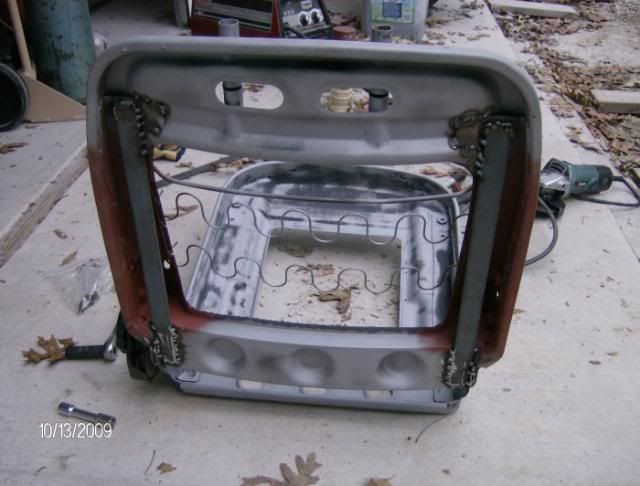
Image
Here is an area that you really want to weld just about the whole seam. This is the joint that is letting the seat twist.
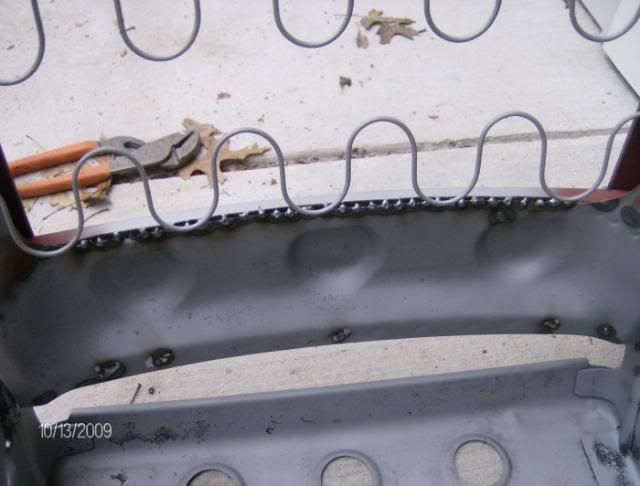
Image
Last edited by azygoustoyou on Thu Oct 15, 2009 4:29 am, edited 1 time in total.
lanciahf

Re: Seat repair

Post by lanciahf »

Don't forget to build a "bass cabinet" into the back sides.
racydave

Re: Seat repair

Post by racydave »

Thats great! And the pics are a good tutorial for all of us!
Post Reply